

Your oven was set to 450°F for two hours and you could still hold your hand inside without flinching. That’s not a quirk, that’s a broken oven. This guide walks you through the most common reasons an oven stops heating properly and what you can realistically do about each one.
Ovens are workhorses. Most people don’t think about them until something goes wrong, and then suddenly dinner plans fall apart and you’re standing in your kitchen wondering if the whole appliance is shot. Here in Maple Ridge, we see this a lot, especially in older homes where appliances have been running for a decade or more without much attention. The good news is that most oven heating problems come down to a handful of specific, diagnosable causes.
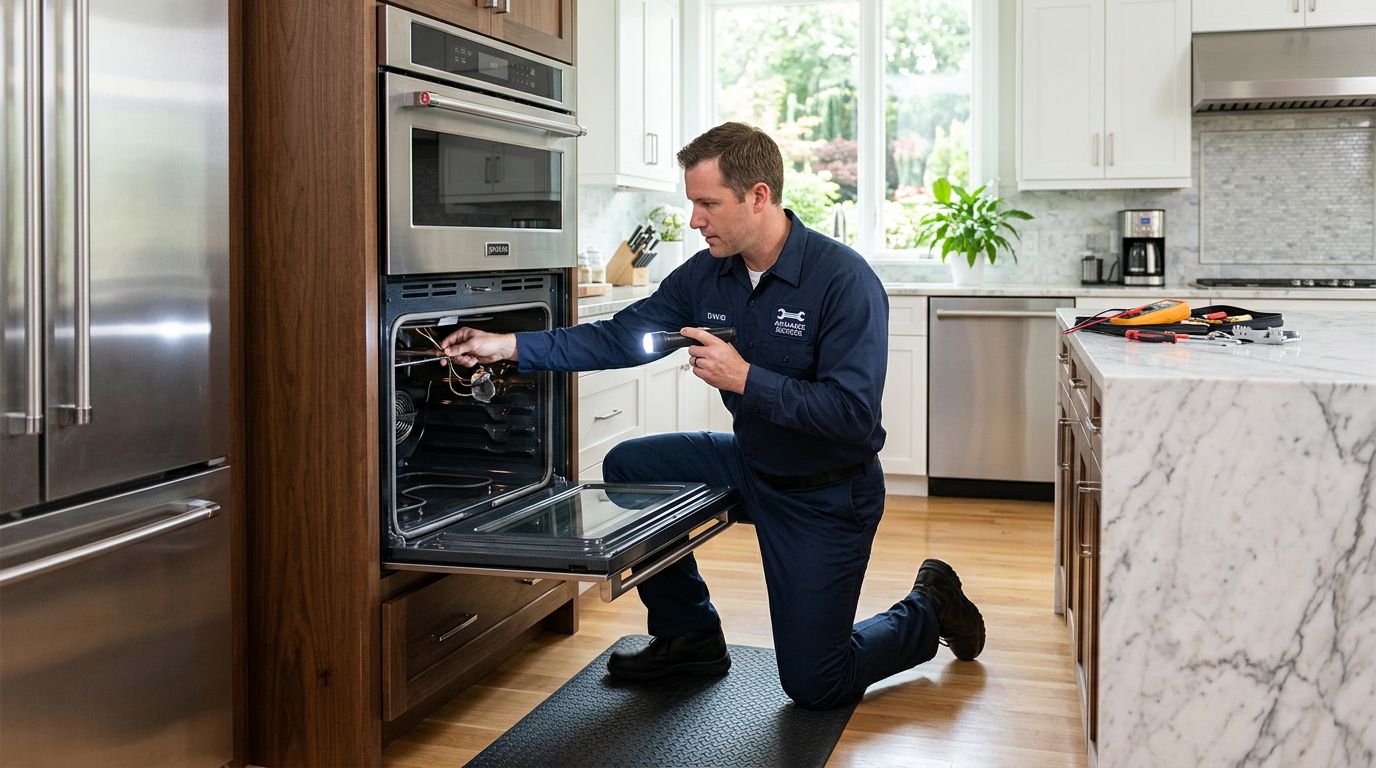
At Simplyfix, we handle appliance repair calls across Maple Ridge and the surrounding area regularly, and oven issues come up more often than you’d think. Some fixes are genuinely DIY-friendly. Others need a trained eye. Either way, understanding what’s going on under the hood puts you in a much better position, whether you’re fixing it yourself or calling someone in.
Key takeaways
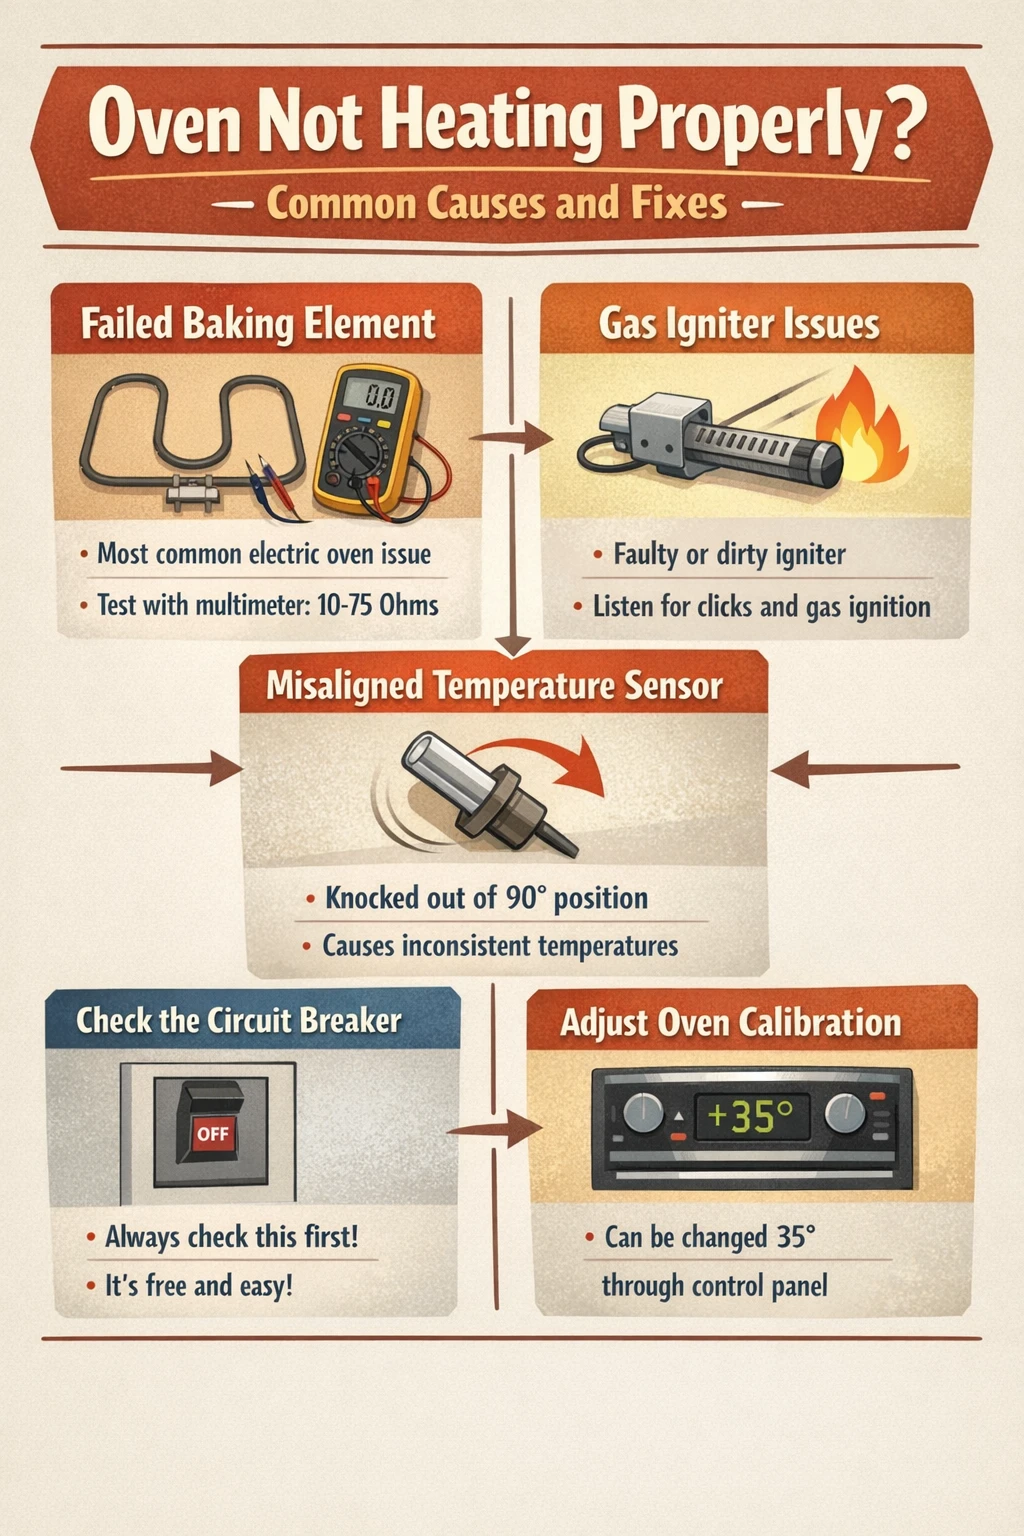
- A failed baking element is the most common cause of an electric oven not heating, and a good element should show between 10 and 75 ohms of resistance when tested with a multimeter.
- Gas ovens that won’t heat usually come down to a faulty or dirty igniter. You should hear a few clicks followed by the gas catching when you turn the oven on.
- A temperature sensor knocked slightly out of its 90-degree position can cause wildly inconsistent temperatures without any visible damage to the oven.
- A tripped circuit breaker is the first thing to check. It’s quick, free, and rules out the most embarrassing possible explanation.
- Oven calibration can often be adjusted through the control panel, sometimes by as much as 35 degrees in either direction, without replacing any parts.
- If repair costs are approaching or exceeding the price of a comparable new appliance, replacement is usually the smarter call.
Why your oven isn’t heating properly
Most oven heating problems trace back to one of four things: a failed heating element or igniter, a faulty temperature sensor, a power supply issue, or a calibration problem. Start with the simplest explanation and work from there. An oven that’s getting warm but not hot enough is telling you something different than one that’s completely cold, and that distinction matters when you’re trying to narrow things down.
If your electric oven is heating slowly and unevenly, a partially failed baking element is the likely culprit. If your gas oven won’t heat at all, the igniter is the first place to look. And if your oven turns on, seems to be working, but consistently undercooks everything, that’s usually a sensor or calibration issue, not a catastrophic failure.
In our experience, people often assume the worst when they notice heating problems. Nine times out of ten it’s one specific component, not the entire appliance giving out. That said, some of these diagnostics do require a multimeter and a comfort level with appliance disassembly, so know your limits before you start pulling things apart.
The baking element (electric ovens)
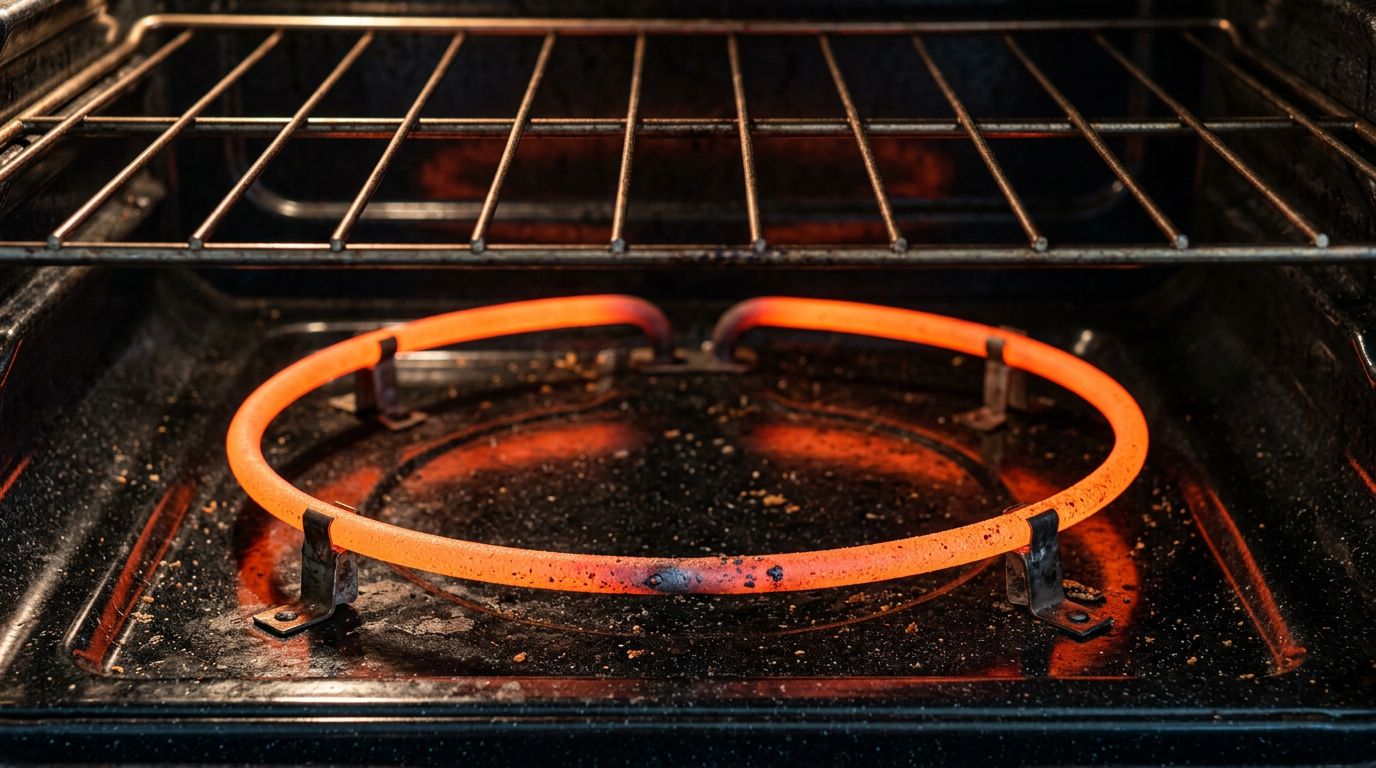
If you have an electric oven, this is where most heating failures happen. Electric ovens typically have two heating elements, a baking element at the bottom and a broiling element at the top. When you set the oven to bake, the bottom element should glow a steady orange-red. If it doesn’t glow at all, or only partially, it’s likely failed.
Visual inspection tells you a lot. Look for bubbling, blistering, or cracks in the element itself. A healthy element has a smooth, consistent surface. One that’s “bubbled up” in spots, or has visible ruptures in the outer casing, is done. It won’t matter what the multimeter says at that point. That physical damage is a clear sign the element has burned out and needs replacing.
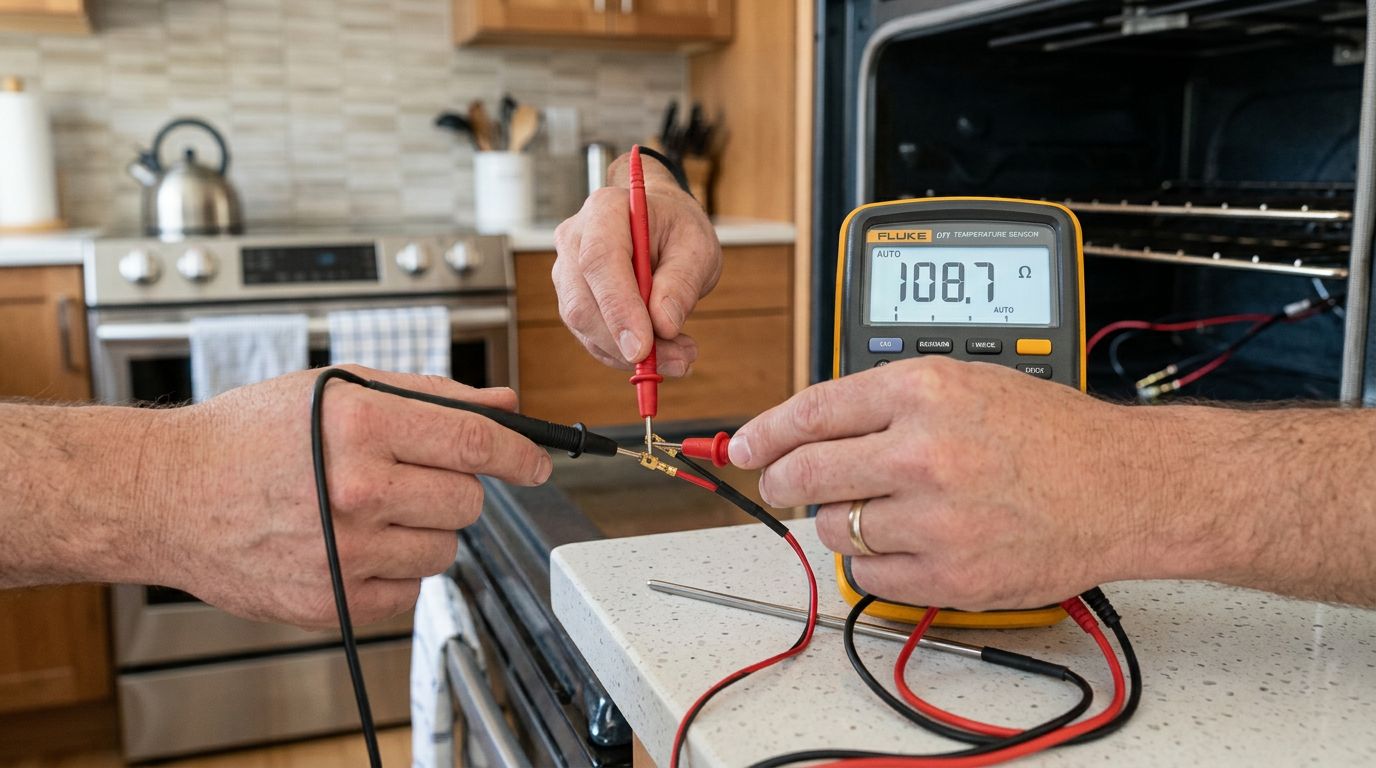
If you want to confirm with a multimeter, set it to resistance and touch the probes to both terminals on the element. A working element reads somewhere in the 10 to 75 ohm range. No reading at all, or a reading of zero, means the element has failed. One thing worth knowing: sometimes a damaged element will still show a resistance reading but lose it the moment voltage is applied. So visible damage plus no glow is enough. You don’t need a perfect multimeter reading to make the call.
Replacing a baking element is one of the more approachable appliance repairs out there. Power off at the breaker first, non-negotiable. When you pull the element free, be careful not to let the wires retract back into the insulation behind the oven wall. If they disappear into the wall, you’re looking at a much bigger job to fish them back out. Use your model number to find the right replacement part. Sites like RepairClinic.com let you search by model number and will show you the exact part along with installation guides.
The igniter (gas ovens)
Gas ovens work differently, and so do their failure modes. When you turn on a gas oven, you should hear a few clicks from the igniter followed by the soft whomp of gas catching. If you hear the clicks but no ignition, or silence altogether, the igniter is the first thing to investigate.
A weak igniter is actually more common than a completely dead one. The igniter draws current to open the gas valve, so if it’s not drawing enough current, the valve won’t open fully, and the oven barely heats or takes forever to come up to temperature. An igniter that glows but takes a long time to light, or produces an uneven, flickering flame, is on its way out.
Dirty igniters are worth checking before assuming the part is dead. Carbon buildup and food debris can interfere with the spark. Your appliance manual will have model-specific cleaning instructions. If there’s no buildup and the igniter still isn’t performing, replacement is the next step, and that’s a job best left to a licensed technician, since it involves the gas supply system.
One important note: if you suspect a gas supply issue rather than an igniter problem, check whether the gas valve on the supply line is fully open. It sounds obvious, but after a repair or installation this sometimes gets missed. If the valve is open and you still have no ignition, call a professional. Don’t try to diagnose a gas line problem on your own.
The temperature sensor
This one catches a lot of people off guard because the oven technically turns on and heats, just not accurately. The temperature sensor is a thin probe, usually mounted in the back corner of the oven, and it tells the control board when to cycle the heating elements on and off. When it’s working properly, your oven holds temperature within a few degrees of where you set it.
When the sensor is out of position, even slightly, the readings go haywire. It should sit at a 90-degree angle to the back wall. If it’s been bumped and is now making contact with the oven interior, it can read the temperature of the wall surface rather than the air inside the oven, and it will cut power to the elements long before the target temperature is reached. Food comes out undercooked. Baking times stretch out. It feels like the oven is broken when really one component is just sitting in the wrong spot.
Check the sensor visually. If it looks like it’s been moved or is touching the oven wall, carefully reposition it. If the problem continues after that, the sensor itself may need replacing. An oven thermometer is a cheap and useful way to verify whether the displayed temperature matches the actual temperature inside. A discrepancy of more than about 25 degrees consistently points to a sensor or calibration problem.
Calibration, the door seal, and power issues
Not every oven heating problem involves a failed part. Sometimes the oven just needs to be recalibrated. If your oven consistently runs 20 or 30 degrees cooler than the set temperature but everything else checks out, calibration is a reasonable next step before spending money on parts.
Many ovens with electronic controls let you adjust the calibration through the settings menu. A common method: press the BAKE and BROIL buttons simultaneously for two seconds until the display shows “SF,” then use the plus or minus keys to adjust the temperature by up to 35 degrees in either direction. Save the change and test again with an oven thermometer. Manual ranges often have a small adjustment screw under the control knob that does the same thing. Check your owner’s manual for the exact procedure, as it varies by model.
Door seal issues are easier to overlook than you’d think. A damaged or worn gasket around the oven door lets heat escape continuously, and the oven never quite reaches the target temperature no matter how long it runs. Run your hand slowly around the door edge while the oven is on. If you feel heat escaping, the seal needs attention. Also check that your oven racks are pushed in fully and that nothing is physically preventing the door from closing all the way, such as bakeware that’s too large, a rack sitting at an angle, or debris around the hinge. These seem minor but they add up.
On the power side, older homes in areas like Albion sometimes have aging electrical panels that are more prone to partial breaker trips. An oven that’s getting warm but never hot enough could be running on only half its power, essentially operating on 110 volts instead of 240. A partially tripped breaker won’t always look tripped. Flip it fully off and then back on. If your oven behaves differently after that, you found it. We also see this in homes around Thornhill where electrical panels haven’t been updated in years, worth keeping in mind if you’ve had any other appliance quirks lately.
When to repair vs. replace
Most single-component failures, a heating element, an igniter, a temperature sensor, are worth fixing, especially if the oven is less than 10 years old. These parts are generally not expensive, and the repair itself is straightforward. A baking element for a common model might run $30 to $80 for the part alone. Sensor replacements are in a similar range. Even if you factor in a service call, you’re usually well below the cost of a new oven.
The math changes when you’re looking at control board failures, wiring issues, or multiple problems at once. Control boards can cost several hundred dollars, and if the oven is already aging, that repair might not make sense. A good rule of thumb: if the repair cost approaches 50 percent of what a comparable new oven would cost, start shopping around.
Homes in Cottonwood and other established neighborhoods around Maple Ridge often have older appliances that have been running reliably for years. We get calls from people who’ve had the same oven for 15 or 20 years and genuinely don’t know whether to fix it or replace it. There’s no universal answer, but getting an honest diagnosis first, before committing to either option, is always the right move. A technician who can tell you exactly what’s wrong and what it’ll cost to fix gives you the information you need to make a real decision.
Frequently asked questions
Below are the questions we hear most often when people are dealing with an oven that’s not performing. Some have clear answers. Others depend on your specific setup, so we’ve tried to give you the honest picture rather than a one-size-fits-all response.
Why is my oven heating slowly but not reaching the right temperature?
This usually points to a partially failed baking element, a weak igniter (in gas ovens), or a temperature sensor that’s giving inaccurate readings. A complete failure would leave the oven cold. Slow heating suggests the component is still functioning but not at full capacity. Start by checking whether the element glows consistently across its full length, and verify the temperature sensor is in the correct position.
Can I replace a heating element myself?
Yes, in most cases, with some important caveats. Cut power at the breaker before touching anything. When removing the element, hold onto the wires so they don’t retract into the wall behind the oven. Use your exact model number to order the right replacement part, and follow the manufacturer’s instructions. If you’re not comfortable working around electrical components or you’re unsure about anything during the process, calling a professional is the smarter move. The repair itself isn’t complicated, but a mistake on a 240-volt appliance is not a minor thing.
My oven turns on and the display works, but there’s no heat at all. What’s happening?
When the controls work but there’s zero heat, the most common causes are a completely failed heating element, a tripped circuit breaker (particularly a partial trip where only one leg of the 240-volt circuit is live), or a faulty selector switch. Check the breaker first, flip it fully off and back on. If that doesn’t resolve it, the element is the next thing to inspect. No glow at all, combined with a resistance reading of zero on a multimeter, confirms a dead element.
How do I know if my oven needs calibration or if something is actually broken?
Use an inexpensive oven thermometer and compare the actual internal temperature against the set temperature at several different settings. If the oven is consistently off by 15 to 35 degrees but otherwise behaves predictably, calibration is likely all you need. If the temperature swings wildly, takes an unusually long time to stabilize, or the oven overheats unpredictably, a faulty temperature sensor is the more likely cause.
Is it safe to use my oven if it’s not heating properly?
It depends on the problem. An electric oven with a partially failed element is generally safe to use cautiously, though food won’t cook correctly. A gas oven that’s clicking but not igniting is a different matter. Repeated failed ignition attempts can let unburned gas accumulate, which is a real safety issue. If you smell gas or hear repeated clicking without ignition, turn the oven off and get it looked at before using it again.
Wrapping up
Most oven heating problems come down to a handful of specific, fixable causes: a failed heating element, a weak or dirty igniter, a temperature sensor out of position, or a power supply issue that’s been sitting there quietly causing trouble. Start with the simplest explanations before assuming the worst, and use an oven thermometer to gather actual data about what your appliance is doing. That information is worth having whether you’re doing the repair yourself or describing the problem to a technician.
If you’d rather not dig into this yourself, or if the initial diagnosis points to something more involved than a single part swap, Simplyfix handles appliance repair across Maple Ridge and the surrounding area. Whether it’s oven repair, stove repair, or any other household appliance giving you trouble, give us a call and we’ll help you figure out what’s actually going on and what it’ll take to fix it.
Recent Comments