
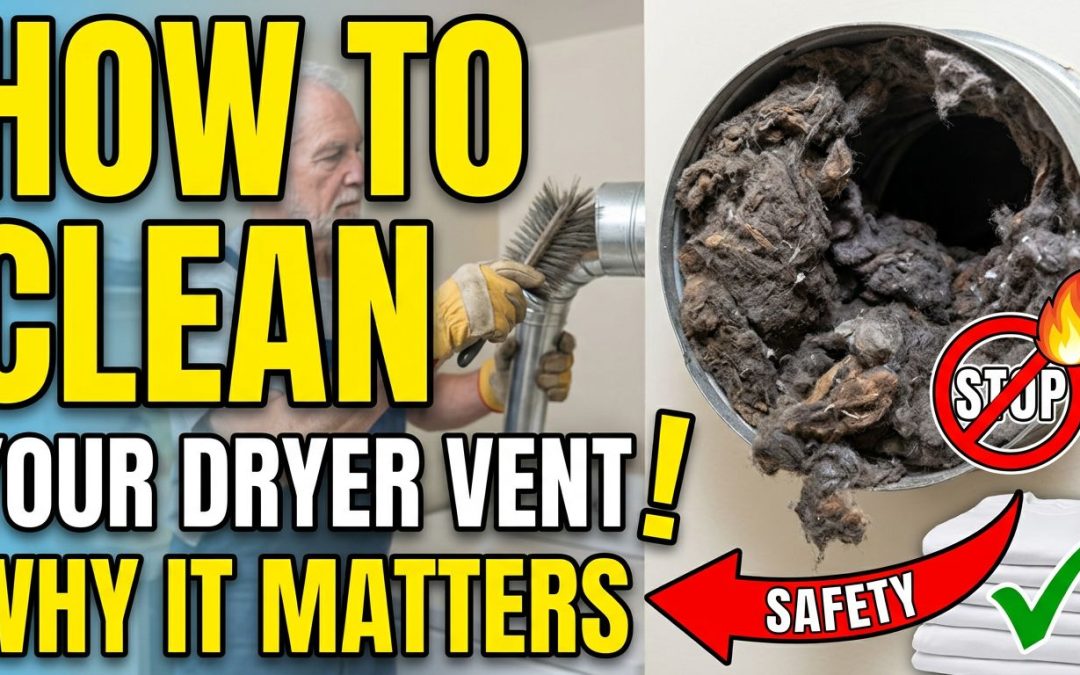
Every year, clogged dryer vents cause thousands of house fires and most homeowners have no idea their vent is even an issue until something goes wrong. This guide walks you through exactly how to clean your dryer vent yourself, what signs to watch for, and when it makes more sense to call in help.
Here in Maple Ridge, we have a lot of older homes with laundry setups tucked into tight spaces basements, interior closets, second-floor utility rooms. That means longer vent runs, more bends in the ductwork, and more places for lint to quietly build up over the years. It’s one of those maintenance jobs that’s easy to forget because the dryer keeps working, just a little slower, a little hotter, until one day it doesn’t.
At Simplyfix, we handle appliance calls across Maple Ridge and the surrounding area, and a surprising number of dryer issues trace back to one thing: a vent that hasn’t been cleaned in years. The good news is that for most homes, this is a job you can do yourself in under two hours with basic tools. Let’s get into it.
Key takeaways
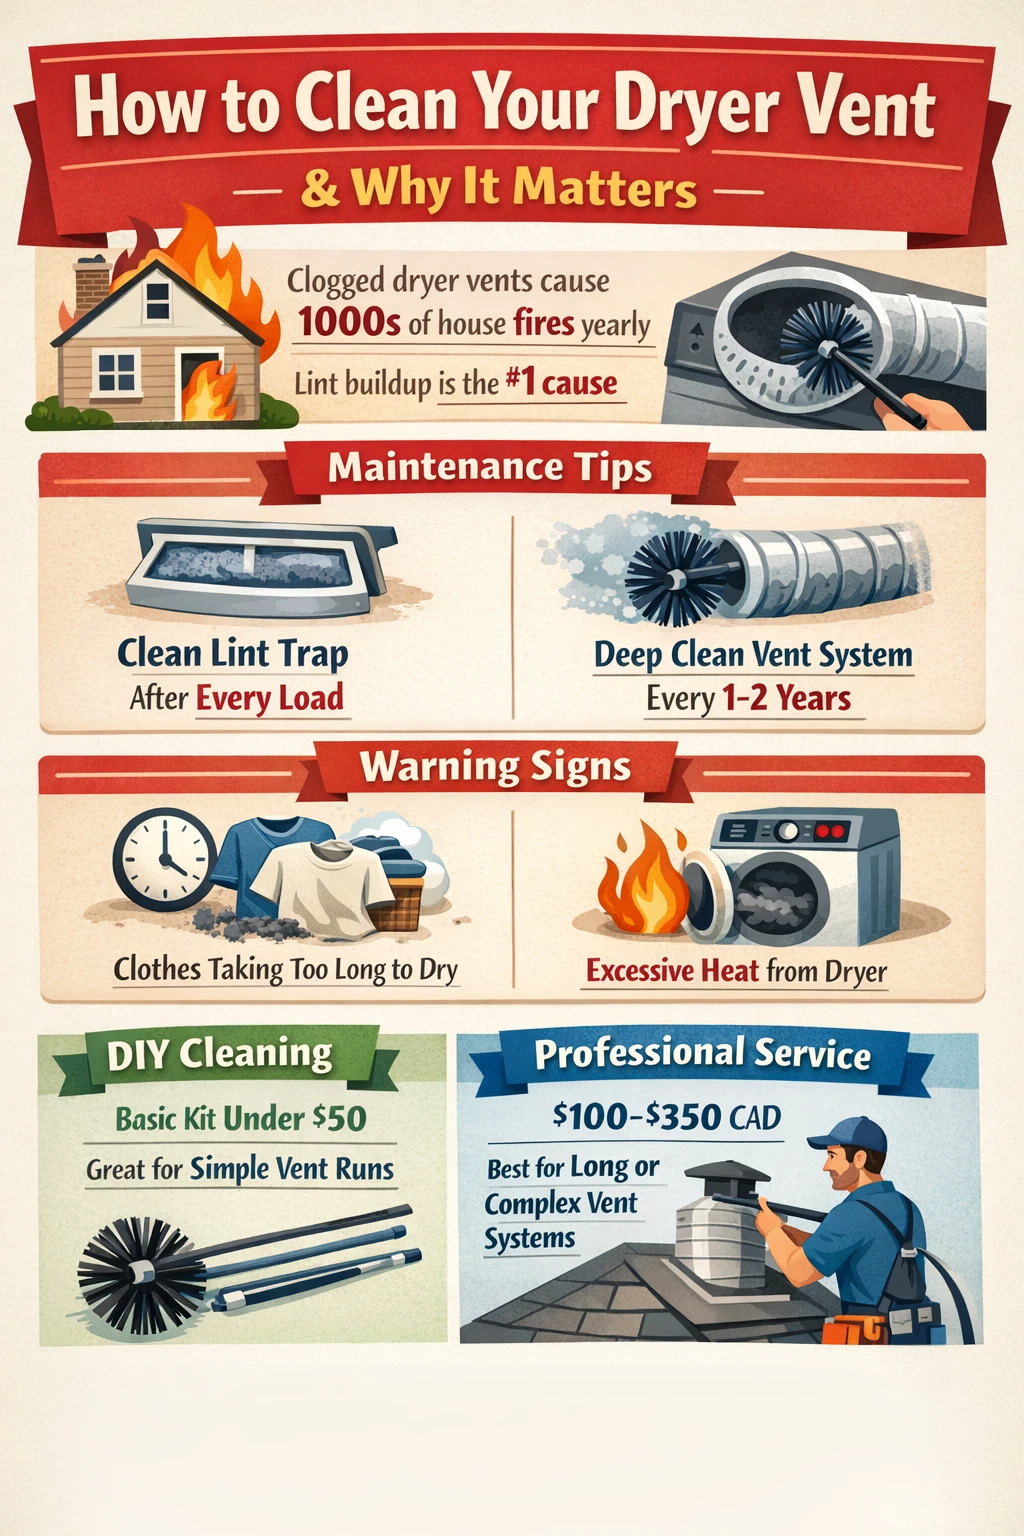
- Clean your dryer’s lint trap after every single load this is the single easiest thing you can do to reduce fire risk and keep drying times short.
- The full vent and duct system should be cleaned at least once every two years, or every six months if you have pets or run heavy laundry loads.
- Lint buildup is one of the leading causes of home dryer fires, according to the National Fire Protection Association.
- If your clothes are taking more than one cycle to dry, that’s a reliable sign your vent is partially blocked.
- A basic dryer vent cleaning kit from a home improvement store typically costs under $50 and handles most standard vent runs.
- For long duct runs with multiple 90-degree bends, professional cleaning is usually the safer and more effective option.
Why your dryer vent deserves more attention than it gets
The dryer vent is a tube that runs from the back of your dryer to an exhaust opening on the exterior wall (or sometimes the roof) of your home. Its job is simple: carry hot, moist air outside so your clothes can dry. When lint accumulates inside that tube, airflow gets restricted. Your dryer has to work harder, run hotter, and take longer to finish a cycle. That’s where the trouble starts.
Lint is highly flammable. When it builds up against a hot duct wall with restricted airflow, you’ve got the conditions for a fire. This isn’t a remote possibility it’s a documented, recurring cause of residential fires. Dryers are responsible for roughly 15,000 house fires each year in the U.S., and the leading cause is failure to clean the vent system. That number sticks with you once you know it.
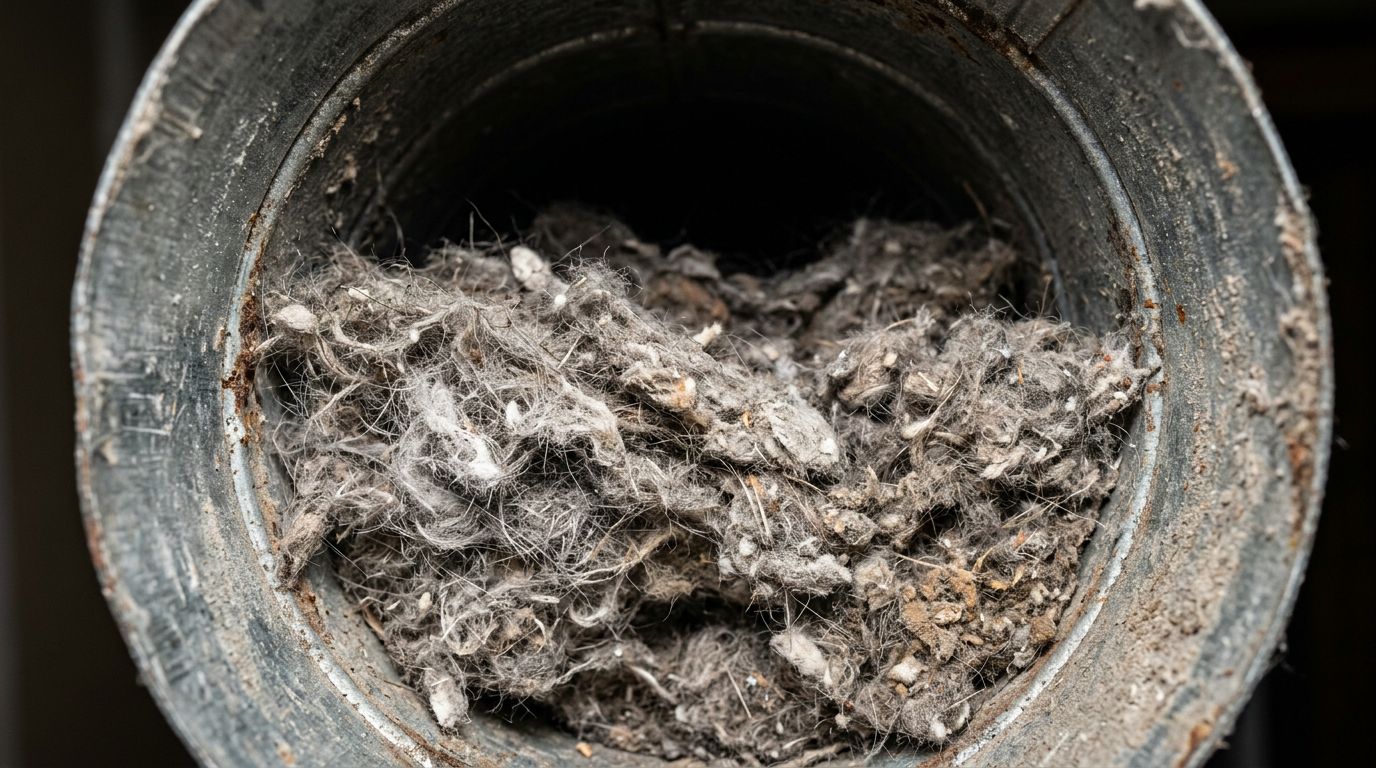
There’s also a more everyday cost. A restricted vent means longer drying times, which means higher energy bills and more wear on your dryer. We see this a lot in older Maple Ridge homes, especially in neighbourhoods like Thornhill where basement laundry setups can have vents running a long distance before they reach an exterior wall. The vent may have been fine when the dryer was new, but after years of use without cleaning, it’s working against you on every load.
How to tell if your dryer vent is clogged
The signs are usually pretty clear once you know what to look for. The most common one is a dryer that takes two cycles to dry a load that used to take one. That’s not the dryer wearing out that’s usually restricted airflow. The moisture has nowhere to go, so it stays in the drum longer than it should.
A few other things worth watching for. If your clothes come out of the dryer feeling unusually hot, or the outside of the dryer cabinet is hot to the touch during a cycle, that’s a sign heat is building up inside instead of venting out properly. A burning smell is a more serious warning and shouldn’t be ignored. Lint visible around the vent opening, or increased humidity in your laundry room, also points to a blockage. Some newer dryers will show an error code when vent flow is restricted check your owner’s manual if you’re not sure what yours displays.
One thing people often overlook: check the exterior vent flap while the dryer is running. It should open and close with airflow. If it barely moves, you’ve got a restriction somewhere in the line. Birds and small animals also like to nest near the exterior opening, which can completely block the vent. We’ve seen this happen more than once in homes around the Albion area if you notice debris or activity around the outside vent, that’s worth investigating before anything else.
What you’ll need before you start
For most homes with a standard vent run (roughly under 10 feet, with one or two bends), this is a straightforward job. You’ll need a dryer vent cleaning kit, which you can pick up at any home improvement store for under $50. These kits include a flexible brush with extendable rods that attach to a drill, and they’re designed to reach through the ductwork and dislodge lint from the interior walls.
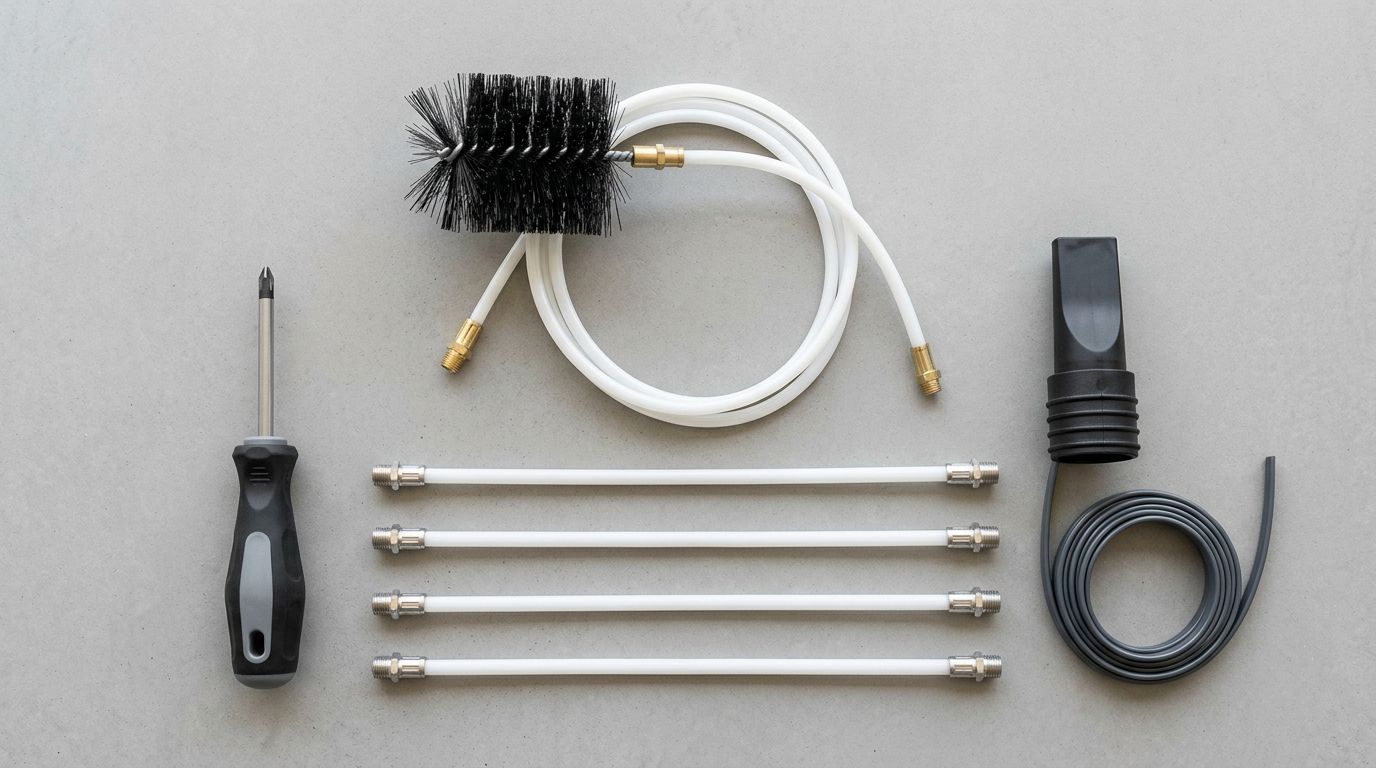
You’ll also want a vacuum with a hose attachment, or a shop vac if you have one. A screwdriver may be needed to loosen the clamps on your vent hose. Gloves are a good idea lint and dust tend to go everywhere once you start disturbing them. If you have a gas dryer, know where the gas supply valve is before you start, because you’ll need to turn it off.
One tip worth passing along: check what your flexible vent hose is made of before you do anything else. Older plastic, vinyl, or foil accordion-style hoses are more prone to trapping lint in their ridges and are considered a fire risk. If that’s what you have, replacing it with a smooth rigid or semi-rigid metal duct is a smart upgrade while you’re already back there. It’s cheap, it’s a straightforward swap, and it makes future cleaning much easier.
Cleaning your dryer vent: step by step
Start by unplugging the dryer. If it’s a gas dryer, close the gas supply valve before you do anything else. Pull the dryer about a foot away from the wall enough room to get behind it and access the vent hose. Having a second person to help move the dryer is worth it, especially in tight laundry rooms.
Locate the vent hose at the back of the dryer. It connects to a port on the dryer and to the duct opening in the wall. Loosen any clamps or remove tape holding it in place some need a screwdriver, others just squeeze open by hand. Disconnect the hose from both ends and set it aside.
Cleaning the lint trap compartment
While you’re at it, pull out the lint trap screen and vacuum out the compartment using a narrow hose attachment. Lint accumulates below the screen in a way that’s easy to miss during regular cleaning. A wire brush from your cleaning kit works well for loosening any packed-in lint before vacuuming it out. Wipe the moisture sensor strips inside the trap housing with a cloth too residue buildup on those sensors can cause your dryer to cut cycles short.
Cleaning the vent hose and wall duct
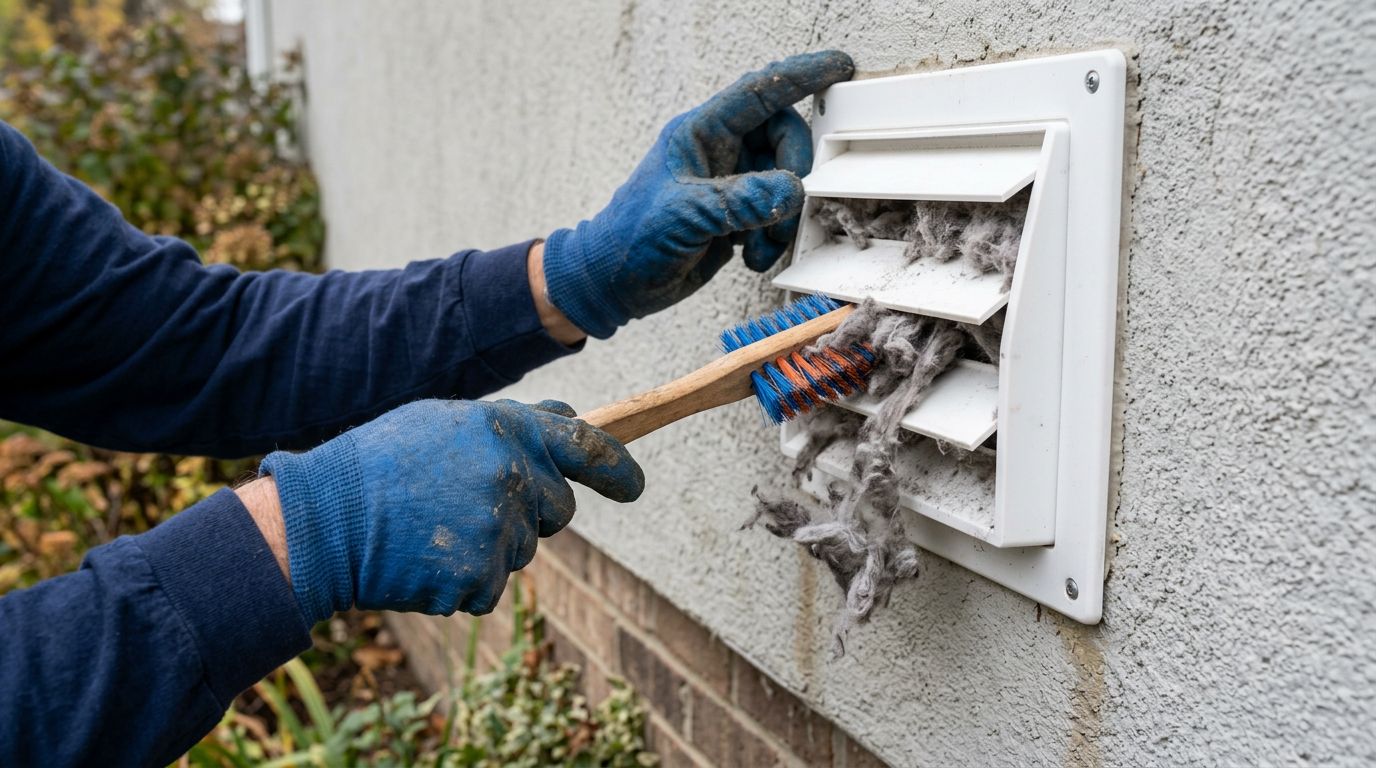
Feed your cleaning brush into the detached vent hose and work it back and forth to loosen lint from the interior walls. Follow up with your vacuum to pull everything out. Then move to the duct opening in the wall: insert the brush and push it as far as it will go, working it in and out while rotating slightly to catch lint from all sides. Vacuum out whatever you loosen.
Head outside and locate the exterior vent cover. Remove any lint, debris, or obstructions by hand, then run the brush through from the outside to clear any buildup near the exterior opening. A vent guard over the opening is worth installing if you don’t already have one it keeps birds and small animals from nesting in there between cleanings.
Reassembling and testing
Reconnect the vent hose to both the dryer and the wall duct, and make sure the clamps are secure. Plug the dryer back in and turn the gas valve back on if applicable. Push the dryer back into place carefully try not to crimp the vent hose as you do. Run the dryer empty for about 15 minutes on the air-dry setting. Check outside to confirm air is flowing out of the exterior vent. If the flap opens and you feel airflow, you’re good.
When the DIY approach hits its limits
Not every vent run is straightforward. If your dryer sits in a finished basement and the vent travels 15 or 20 feet through the wall before exiting, or if there are multiple 90-degree bends, a standard cleaning kit probably won’t get the job done. The flexible rods tend to get stuck at sharp turns, and you can’t always tell whether you’ve actually cleared the blockage or just pushed the lint further along.
In these cases, calling a professional is genuinely the better move not just the easier one. Chimney sweep companies and HVAC services often handle long vent runs using equipment that creates consistent airflow while brushing from the outside in, which is the more effective direction. Someone quoted a professional clean for their townhouse at around $300 CAD a few years back, and by all accounts it was worth every dollar given how long the vent had gone without attention. If a vent hasn’t been cleaned in over a decade, that’s money well spent.
Also worth knowing: if you move into a previously owned home and this comes up often in communities like Cottonwood where housing stock turns over regularly you have no idea how well the previous owners maintained that vent. Cleaning it before you settle in is just good practice. You don’t know what’s in there, and lint doesn’t announce itself until it’s already a problem. The NFPA recommends having a dryer vent professionally inspected if you’re unsure of its history.
Keeping up with vent maintenance going forward
Once the vent is clean, keeping it that way is much less work than the initial cleaning. Clean the lint trap screen before every single load it takes five seconds and it matters. Every six months, pull the screen out completely and deep clean it with hot water, a nylon brush, and a little dish soap, then let it dry fully before putting it back. Fabric softener sheets leave a residue on the mesh over time that reduces airflow in ways you can’t always see.
For the full vent and ductwork, aim for a complete cleaning every two years at minimum. If you have pets, bump that to once a year pet hair speeds up lint accumulation noticeably. Regularly vacuuming and sweeping the area around the dryer also helps reduce how much debris ends up in the system in the first place.
A few other habits that help. Keep the area around the exterior vent clear of debris, especially after storms. Check the vent flap every few months to make sure it’s opening freely. And if you ever smell something burning while the dryer is running, stop the cycle and investigate before running it again. That’s not a smell to ignore or chalk up to a fluke. For more on safe dryer use, Health Canada’s home safety resources cover general appliance ventilation guidelines worth bookmarking.
Frequently asked questions
These are the questions we hear most often when people are dealing with dryer vent issues for the first time or realizing they’ve never really dealt with it at all.
How often should I clean my dryer vent?
At minimum, clean the full vent and ductwork once every two years. If you run a lot of laundry, have pets, or use your dryer daily, once a year is a better target. Clean the lint trap screen before every load without exception.
There’s no single schedule that works for every home. A family of five doing laundry every day has a very different situation than a single person running a load or two a week. When in doubt, pull the dryer out and check the duct opening if you can see visible lint accumulation near the connection point, it’s time to clean.
Can I clean the dryer vent without moving the dryer?
You can clean from the exterior vent opening without moving the dryer, and that’s a reasonable option if the vent runs are relatively short and straight. Remove the exterior vent cover and work your cleaning brush and vacuum through from the outside. This handles a good portion of the lint in many cases.
That said, cleaning from the inside gives you access to the section immediately behind the dryer, which is where the hose connects and where kinks, gaps, or damage are most likely to show up. If you can manage to pull the dryer out even partway, it’s worth doing. For anyone who genuinely can’t move the appliance, that’s a good reason to bring in a professional.
What’s the difference between cleaning the lint trap and cleaning the vent?
The lint trap catches a large portion of the lint from each load, but not all of it. What gets past the trap travels through the vent hose and ductwork toward the exterior. Over time, that lint sticks to the duct walls and accumulates especially at bends and joints. Cleaning the lint trap keeps the dryer running from cycle to cycle. Cleaning the vent is what prevents a long-term buildup that restricts airflow and creates a fire risk.
Think of it this way: the lint trap is routine maintenance, and the vent is the bigger annual or biannual job. Both matter, and neither replaces the other.
What does a professional dryer vent cleaning cost?
For a standard vent run, professional cleaning typically falls in the range of $100 to $200 CAD. Longer or more complex runs especially in multi-storey homes where the vent travels through multiple floors can run higher, sometimes $250 to $350 or more depending on the job. Given the fire risk involved with a neglected vent, most people find that cost easy to justify.
If a service provider can’t explain clearly what they’re doing or what they found, that’s a reason to ask more questions before you agree to the work. A good technician should be able to tell you how the vent is configured, where the buildup was, and whether there are any issues with the ductwork itself.
What should I do if my dryer vent runs through the roof?
Roof-vented dryers are not uncommon, and they’re genuinely harder to clean without the right equipment. The vent run is usually long, the angle works against you, and accessing the exterior opening safely requires working at height. This is a case where calling a professional is the right call not because the cleaning itself is technically complicated, but because DIY attempts on roof vents often result in incomplete cleaning, damaged ductwork, or a safety risk that wasn’t worth taking.
Wrapping up
Cleaning your dryer vent is one of those jobs that pays you back well beyond the effort it takes. You get shorter drying times, lower energy costs, a longer-lasting appliance, and most importantly a meaningfully reduced risk of a dryer fire. Clean the lint trap before every load, deep clean the vent at least every two years, and check the exterior opening a few times a year for obstructions. That’s really the whole plan.
If your vent runs a long way through the wall, you’re dealing with an older home where nothing is quite where you’d expect it to be, or you’d simply rather have someone with the right equipment handle it, that’s exactly what we’re here for. At Simplyfix, we handle dryer repair and appliance maintenance calls across Maple Ridge and the surrounding communities. Give us a call and we’ll help you figure out what your setup actually needs no guesswork, no overselling.
Recent Comments